"You don't strike me as the Martha Stewart type"

I am a Craft Instructor for Michael's, but first and foremost a Mom. This blog is going to cover the projects that go on in my studio, classroom, and kitchen. I am constantly learning new techniques and love to share them with my friends and family. I am primarily a paper crafter, but there will also be features on children's crafts, baking and other recipes, and doll and miniature crafting. There's no right or wrong in arts and crafts. Just relax and have fun!


Showing posts with label demo. Show all posts

Friday, September 14, 2012

No-Sew T-Shirt Tote Bags


Crafting to Disney Series, Part 2 

  I learned to whip these up after being inspired by a demo at my store.  You can find the instructions and photos for the inspiration project here:   http://www.michaels.com/T-Shirt-Tote-Bag/e10050,default,pd.html .  Yay for recycling!  I hopped on pinterest and searched for no sew tote bags and found about a zillion versions of essentially this bag.  It only requires three items:
 
 
       ·         The T-Shirt you are gonna cut up to make the tote bag.
      ·         Scissors
      ·         A single safety pin

That’s it.  Basically, it’s the shortest supply list ever.  This is going to read more complicated than it really is.  They literally take 10 minutes to make.  First lay the T-Shirt flat on your work surface.  Cut the sleeves completely off, cutting at a right angle on the inside of the hem. 
 
 
Save the sleeves!!  Cut a large rectangular area around the collar, matching the length of the cuts of the sleeves, removing it completely.  It will look like this when you are done. 
 

Yes, I know I cut Mickey’s head off.  I have other plans for that in an upcoming Mod Podge shadow box project.  Stay tuned. 
 

Take the fabric that is now the straps and gently pull on it, curling the edges of the t-shirt fabric slightly under.  I also gently pull around the cut areas at the top of the bag, so the edges look a little nicer.  Remember, it’s supposed to be “shabby chic.” 

The most ingenious part of this project is tying the bottom of the bag up with t-shirt yarn made out of the sleeve.  T-Shirt yarn has a ton of uses.  It can be crocheted or knitted just like any other yarn.  It can be looped to make funky necklaces and bracelets.  To make it, simply take the sleeve and cut a strip about a half inch wide. 
 
Turn the sleeve spirally as you cut to make one long string.  Now take the ends of the string and pull!  The edges fold up and you have a length of t-shirt yarn. 
 
 
Use it to close up the bottom of the bag.  Make a two slits opposite each other in the hem of the bag, but don’t cut all the way through the hem. 
 
 
Now, using a safety pin as a guide, feed two lengths of the t-shirt yarn through the tubes in the fabric created by the hem. 


Tie them off in double (triple!) knots and trim the edge.  Voila.  Saving the environment, one mickey pants bag at a time.

I’ve also made an Eeyore one, cause he’s my fave. 
 
 
Here are two small Tinker Bells ones made from my daughter’s old tees, size 2T, pretty darn cute. 
 

I’m a reusable tote junkie.  (Who really wants to be contributing to that crazy plastic bag island in the Pacific?  http://en.wikipedia.org/wiki/Great_Pacific_Garbage_Patch )  I love them.  I use them all the time.  My primary grocery ones are store bought, but these are great for a trip to the farmer’s market.  Need another tote to haul a few craft supplies while you are on your Disney vacation?  Bingo.  J     

Thursday, March 29, 2012

Another Drink of Punch

Punch Around the Page – Corner Card Technique

Here’s a sneak preview of an upcoming demo for April 21st, and a special one day class on May 12th!  It’s Martha Stewarts Punch Techniques class featuring the oh-so-cool punch around the page technique.  It will really make people ask, “How did you do that to your paper?”  It’s complicated looking, but with a little practice yields great results easily, with just a few punches.  Here is a card featuring the full technique:
 
But sorry folks, I am not going to spill the beans on that card today.  To learn the full border technique and lots more, come see me at the store for the demo and sign up for class!  The card I am writing about today features a nifty corner punch detail.  This one’s all in the angle. 

What is punch around the page?  It’s a set of two coordinating punches, a corner punch and a border punch.  They have special markings on them that help in aligning them together.  They are designed to give a continuous punched look around a border.  Here is the class kit I am working out of. 

This kit does NOT include the punch around the page punches!  It simply has the materials to produce a total of six cards in four designs, as well as detail instructions.  Any Martha Stewart punch around the page set could be used.  I am using the “Loops” set.  Here are the materials to complete the card:
 
  • A blank green cardstock pre-folded card
  • Coordinating decorative paper and pink cardstocks pre-cut to fit
  • A pink “Thinking of you” phrase embellishment sticker
NOT included in the kit:

  • A glue stick (always, always, ALWAYS acid free)
  • The corner punch part of the punch around the page set  
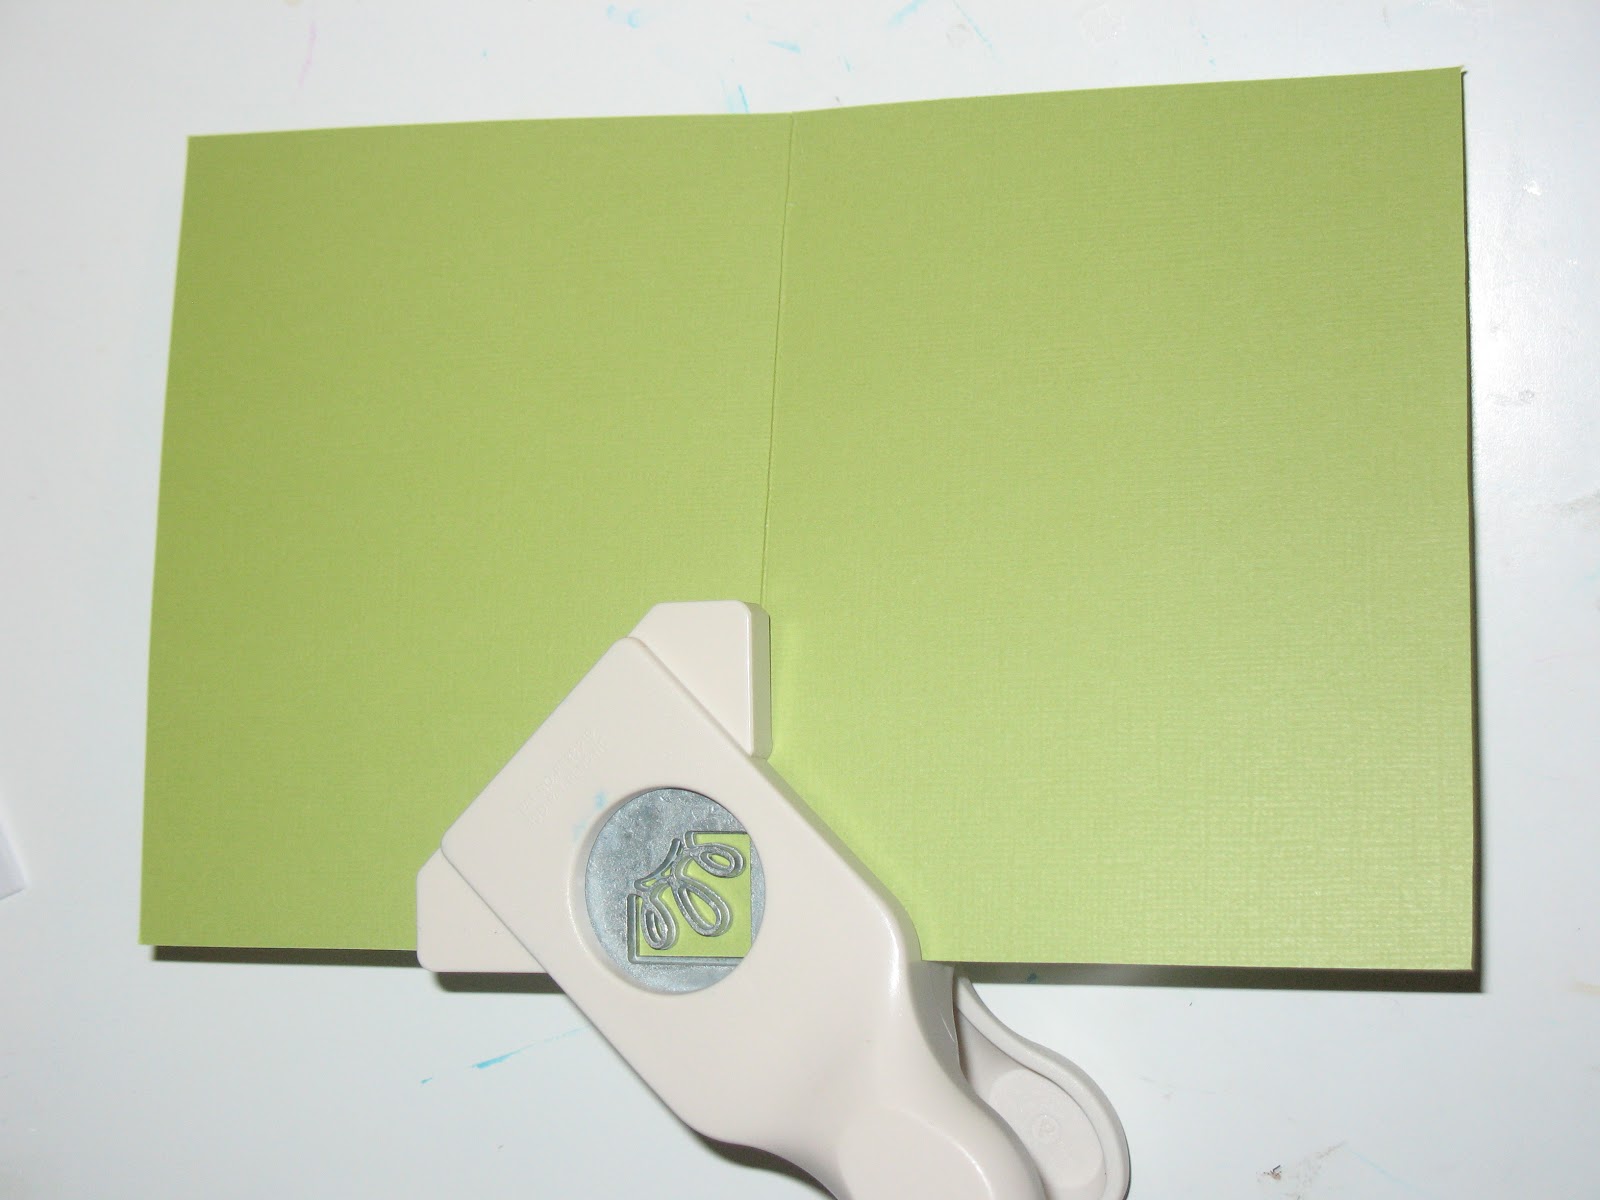
The first step is the trick that makes the look of this card unique.  Open the pre folded card and punch the top corners on the front of the card first.  Do this by holding the punch at an angle and aligning the fold of the card with the silver mark on the side of the punch.  Align the other side of the corner with the edge of the wing of the punch.  The alignment looks like this:

Whenever you punch, do it upside down.  This really allows you to see the positioning of the paper in the punch.  This will prevent any “oops, I thought I was punching right there” moments.  Repeat this step on the other top corner.

For the bottom corners simply punch just like a regular corner punch, aligning the paper corners with the popped out “wings” on the side that help guide the punch.

Next layer and adhere the light pink cardstock underneath the green card front.  This lets the contrasting color peak through the punched pieces on the card front corners.

Now the easy part, layer and adhere the darker pink cardstock strip to the center of the card front.  Then add the decorative paper to the center of your dark pink stripe. 

Now you’re ready to add the finishing touch!  Place the journaled embellishment in the center of the decorative paper.  You could use foam dots for this if you’d like to give it some extra dimension.
    

Easy, easy, easy, EASY!  Now reward yourself and go have a drink of punch, rum if you please.  ;)


Tuesday, March 06, 2012

Roll one up! Making paper roses.

This past weekend at my store we had our open house event with all the instructors showing off thier crafty creations.  One of the classes I showcased was called FlowerWOW! It features this super easy flower making technique.  The variations and applications are basically endless.  Cut with decorative scissors to give a wavy edge.  Ink the edges of your petals for a dipped or faded look.  Distress the paper to look worn.  Add glue and glitter.  Cut out green paper leaves to accent.  Don’t be afraid to use pattered decorative papers, or use double sided paper for an even cooler look.
Here are the basic steps.   You probably have all the supplies needed to roll one right now!
  •  Scissors
  • A pencil
  • Adhesive – I actually use two different ones for this project, a glue stick and craft glue (I use Aleene’s Tacky Glue).  These both look white when applied but dry clear.    
  • A paper circle.  Obviously, the larger the circle the larger the flower.  I tried circles as large as 6 inches and as small as 2 ½ inches.  Pick any color or pattern you like!  I tried with both a lighter weight decorative paper and a medium weight cardstock, and got similar results with both. 
First, draw a spiral in your circle, like this:
Try to keep the width even throughout the spiral.  Then cut along the line you just drew.  If you are inking your edges go ahead and do so and let them dry for a couple minutes.
Start rolling the paper from the OUTSIDE end of the spiral.  Give it a couple practice rolls. 
Start the roll tight.  When you get to the end, if you want it tight keep your fingers held if you want you flower to be more open, release your fingers a bit and let the paper unroll some.  The inside of the spiral will look like a small flap.
Cover that with adhesive and press it to the base to seal the bottom of the flower.  I use the glue stick for this part.  Then I go back and reinforce the flower by slipping the tip of the tacky glue in between the petals and squeezing a little into the bottom center.  Then I press down the middle of the spiraled petals to adhere them.   
That’s it!  Now that you have a flower, make a couple more!
Now that you have a few flowers made, here are some ideas on what to do with them:  use one on a card or gift tag, mount them on a canvas painted in a contrasting color, make a dozen and attach them to stems and put them in a vase for a fun faux flower arrangement, make lots more and attach them with hot glue to a wreath.
Want to learn more fun, new techniques like this?  Come to my next Crop event.  It will be March 17, 2012 from 1-7 p.m.  As always the fee is only $5.00!!

Monday, January 30, 2012

Scrapbook Layout - Demo Timesavers

One of my favorite parts of my job is something called “Demos.”  Basically this is where I sit at a table in the front of my store and do a quick project while talking up customers about our products and my classes.  If you’ve ever been to a major craft store on a busy Saturday afternoon you have probably seen a Demo in action.  These can be a great resource for customers, and are not just limited to scrapbooking.  I have also done mixed media and general crafting demos.  Other instructors also have demos.  You could catch some great baking tips or learn a new jewelry making technique.  There are schedules of these available online at www.Michaels.com, but the best way to find ones that catch your interest are to check the in-store calendars.
As an instructor there are many challenges that a demo project can present.  You rarely have an electrical outlet or sink, your workspace is very limited, and there can often be messy materials like paint or mod podge involved.  However, I find with scrapbooking demos the biggest limitation I have is time.  This leads me to plan my layouts in advance thinking of impactful techniques that are super speedy.  Here is the layout that I created during my in store demo time this past Saturday:
Meet my cutie niece!
A few products helped make this complicated looking border and color blocked matting technique go quickly. 
They include a white acid free gel pen, glitter roll tape by Recollections, and cardstock stack pad that is pre-cut to border size with the adhesive pre applied.  Since the back is peel and stick you aren’t wasting any time with a messy glue stick.  I am using DCWV brand Textured Cardstock Adhesive Border Stack in the brights color palette for this layout.  They are relatively inexpensive and come with 36 border sheets in a variety of colors.  I also have a neutrals pack which is nice to use for bases in more elaborate border techniques.  The borders are 12” x 2”, but they can be punched or cut to any size.  The color blocked matting featured on the photos is simply border pieces cut to size and adhered to a single mat under the photo.  The white gel pen dashes add a faux stitched look quickly.  The border for this page was created by layering two border strips together, then adding a strip of glitter tape on top.  The glitter roll tape also has a simple peel and stick back and can be cut easily to any length.  It gives an embellishment an extra little pop when used as a border:
In between assisting customers and talking up classes there just simply isn’t much time to complete a demo project in the hour we are allotted.  This layout was put together in under thirty minutes, including stamping and a couple minutes of ink drying.  You still say you don’t have time for scrapbooking?  I bet you really do!